TypeScript+three.js+three-vrmでVRMをブラウザ上でレンダリングする
経緯
よくうちの子の資料として VRoidHub に VRM モデルをアップロードして見てもらっていた。しかし第三者にダウンロードされることがあるということで、現在は暫定的に静止画のみになってしまいました。
これでは資料として使えないので、自前でVRMモデルを表示できるツールが必要になったのがきっかけです。
対象読者
- npmを触ったことがある
- TypeScriptに興味がある
- VRMに興味がある
環境構築
使用するパッケージ
今回使用するパッケージは以下の通りです。
- typescript: 4.2.3
- webpack: 5.28.0
- webpack-cli: 4.6.0
- webpack-dev-server: 3.11.2
- ts-loader: 8.1.0
- three: 0.127.0
- @types/three: 0.126.2
- @pixiv/three-vrm: 0.6.2
パッケージインストール
npm init
npm i -D typescript webpack webpack-cli webpack-dev-server ts-loader @types/three
npm i three @pixiv/three-vrm
package.json は以下の通りになります。 scirptsにコンパイル、ビルド、開発サーバ起動コマンドを追記しています。
{
  "name": "vrm_viewer",
  "version": "1.0.0",
  "description": "",
  "main": "index.js",
  "scripts": {
    "tsc": "tsc",
    "build": "webpack",
    "watch": "webpack --watch",
    "start": "webpack serve --config ./webpack.config.js"
  },
  "author": "",
  "license": "ISC",
  "devDependencies": {
    "ts-loader": "^8.1.0",
    "typescript": "^4.2.3",
    "webpack": "^5.28.0",
    "webpack-cli": "^4.6.0",
    "webpack-dev-server": "^3.11.2"
  },
  "dependencies": {
    "@pixiv/three-vrm": "^0.6.2",
    "@types/three": "^0.126.2",
    "three": "^0.127.0",
  }
}
TypeScript コンパイラの設定
コンパイラの設定ファイル(tsconfig.json)を作成します
npx tsc --init
tsconfig.json を編集します
{
  "compilerOptions": {
    "target": "es5",
    "module": "commonjs",
    "lib": [
        "dom",
        "es2019"
    ],
    "outDir": "./dist",
    "strict": true,
    "esModuleInterop": true,
    "skipLibCheck": true,
    "forceConsistentCasingInFileNames": true
  },
  "include": [
    "./ts/**/*.ts"
  ]
}
webpack の設定
webpack.config.jsを作成し、編集します。
const path = require('path');

module.exports = {
    // production: 最適化
    // development: ソースマップ有効
    mode: 'development',

    // エントリーポイント
    entry: {
        main: './ts/index.ts'
    },

    output: {
        path: path.join(__dirname, "dist"),
        filename: "index.js"
    },

    devtool: 'source-map',

    // 開発サーバの設定
    devServer: {
        open: true,
        openPage: "index.html",
        contentBase: path.join(__dirname, "dist"),
        watchContentBase: true,
        port: 8080
    },

    module: {
        rules: [{
            // *.tsを
            test: /\.ts$/,
            // TypeScript コンパイルする
            use: 'ts-loader'
        }]
    },

    // import文で *.ts ファイルを解決する
    resolve: {
        modules: [
            "node_modules",
        ],
        extensions: [
            '.ts',
            '.js'
        ]
    }
};
コーディング
Hello, World
ひとまず構築した環境でコーディングできるか試してみます。
./ts/index.ts を作成し、下記のコードを記述します。
window.addEventListener("DOMContentLoaded", () =>{
    console.log("Hello, World");
});
次に下記コマンドを実行し、./dist/index.js が生成されることを確認します。
npm run build
./dist/index.html を作成し、下記のコードを記述します。VSCodeなどEmmetが使えるエディタであれば、html:5[TAB]と入力すると一発でひな形が作れます。
<!DOCTYPE html>
<html lang="ja">
<head>
    <meta charset="UTF-8">
    <meta http-equiv="X-UA-Compatible" content="IE=edge">
    <meta name="viewport" content="width=device-width, initial-scale=1.0">
    <script src="./index.js"></script>
    <title>Document</title>
</head>
<body>
</body>
</html>
webpack-dev-server を使用して動作確認します。下記コマンドを実行します。
npm run start
するとブラウザが立ち上がります。今回はDOMロード時にログを出力するという動作なので、F12キーで開発者ツールを開き、コンソールを確認すると、正しく出力されているはずです。

three.js を使用する準備
それでは本題のVRMモデルをブラウザ上でレンダリングするためのコードを書いていきます。
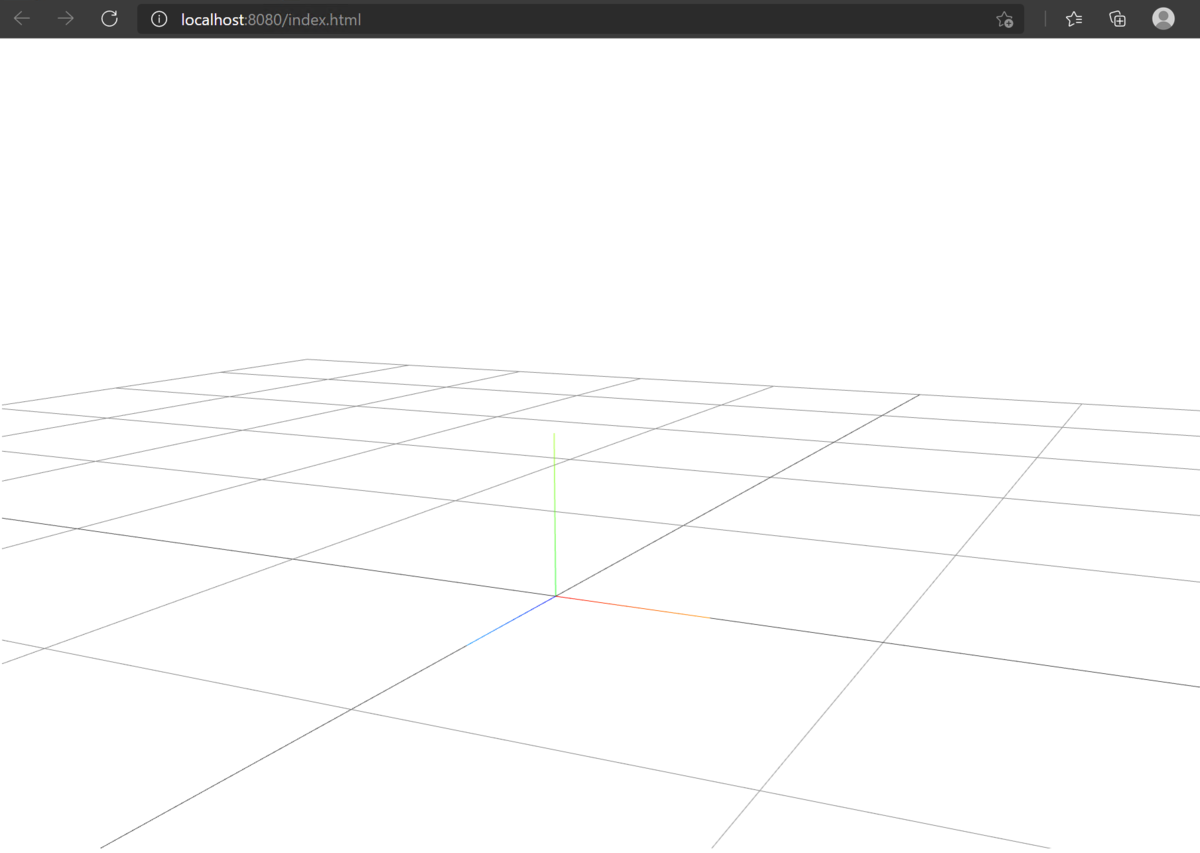
import * as THREE from "three";
import { OrbitControls } from "three-orbitcontrols-ts";

// レンダラーの設定
const renderer = new THREE.WebGLRenderer({
    antialias: true,
    alpha: true,
});
renderer.setSize(window.innerWidth, window.innerHeight);
renderer.setPixelRatio(window.devicePixelRatio);
document.body.appendChild(renderer.domElement);

// カメラの設定
const camera = new THREE.PerspectiveCamera(
    35,
    window.innerWidth / window.innerHeight,
    0.1,
    1000,
);
camera.position.set(0, 1.1, 3);

// カメラコントロールの設定
const controls = new OrbitControls(camera, renderer.domElement);
controls.target.set(0, 0.85, 0);
controls.update();

// シーンの設定
const scene = new THREE.Scene();

// ライトの設定
const light = new THREE.DirectionalLight(0xffffff);
light.position.set(1, 1, 1).normalize();
scene.add(light);

// グリッドを表示
const gridHelper = new THREE.GridHelper(10, 10);
scene.add(gridHelper);
gridHelper.visible = true;

// 座標軸を表示
const axesHelper = new THREE.AxesHelper(0.5);
scene.add(axesHelper);

// レンダリング
tick();

function tick(){
    requestAnimationFrame(tick);
    renderer.render(scene, camera);
}
ここまででいったん実行すると、床面にグリッドと原点に座標軸が表示されます。基本的なマウス操作もすることができます。
- 左クリック: カメラ回転
- 右クリック: カメラ移動
- ホイール: カメラズーム
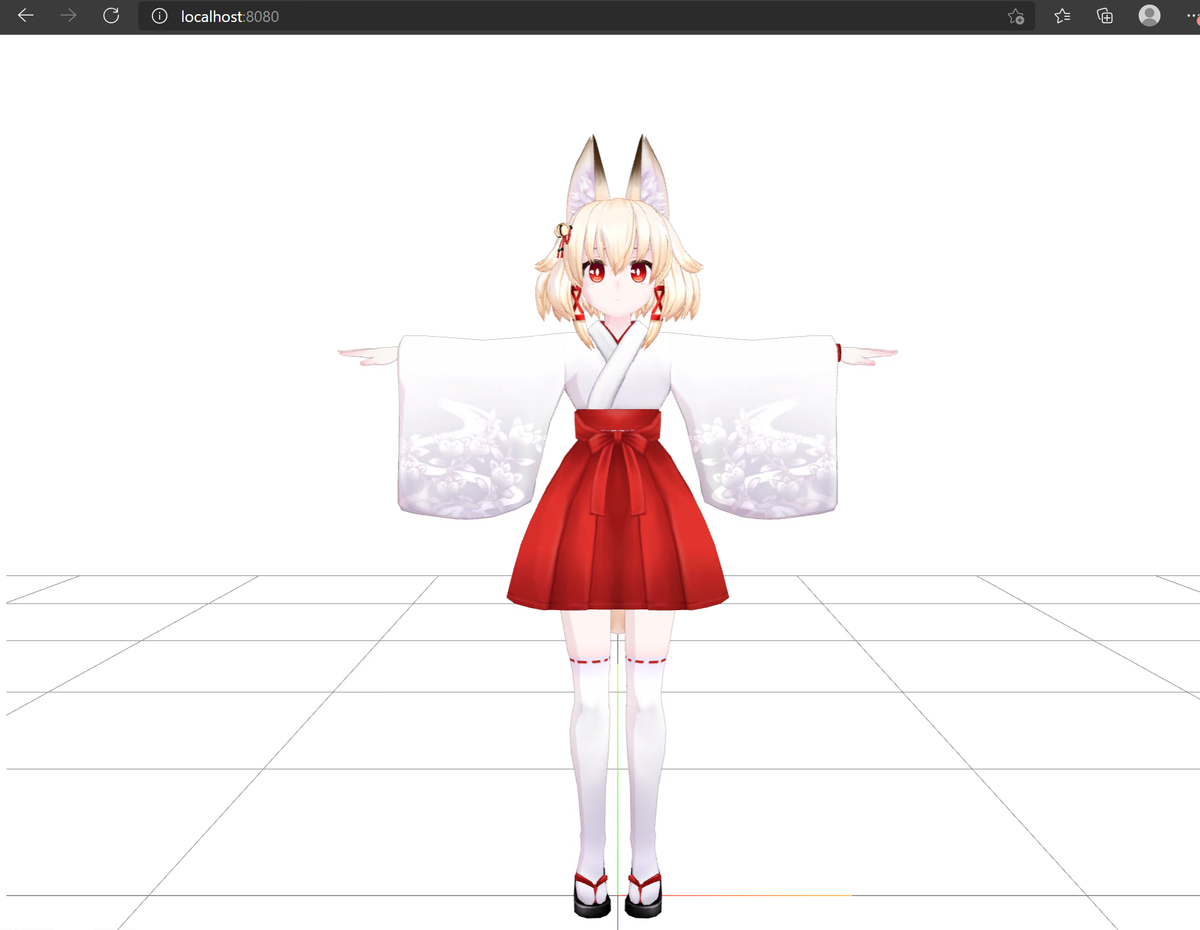
VRMのレンダリング
それでは実際に VRM をレンダリングします。今回はキツネツキ様の右近ちゃん(VRoidHub)のVRMを使用します。
ktntk_ukon.vrmにリネームして./dist/modelsに配置します。
VRM は GLTF というフォーマットをベースにしており、three.js では GLTFLoader を使用して読み込みます。GLTFLoader は Promise に対応していないため、Promise を返すラッパークラスを作ります。
import { GLTFLoader, GLTF } from 'three/examples/jsm/loaders/GLTFLoader'

export class PromiseGLTFLoader extends GLTFLoader{
    promiseLoad(url: string, onProgress?: ((event: ProgressEvent<EventTarget>) => void) | undefined){
        return new Promise<GLTF>((resolve, reject) => {
            super.load(url, resolve, onProgress, reject);
        });
    }
};
読み込んだ GLTF をもとに VRM インスタンスを作成し、シーンにロードします。
// モデルをロードする
async function loadModel (url: string, onProgress?: (progress: ProgressEvent<EventTarget>) => void){
    try{
        const loader = new PromiseGLTFLoader();
        const gltf = await loader.promiseLoad(
            url,
            progress =>{
                if(typeof onProgress === 'function') onProgress(progress)
            },
        );
        const vrm = await VRM.from(gltf);
        scene.add(vrm.scene);
        vrm.scene.rotation.y = Math.PI;
    } catch(e){
        console.error(e);
    }
}
最後に作成した関数に URL を渡してあげれば VRM が描画されます。
loadModel(
    './models/ktntk_ukon.vrm',
    progress =>{
        console.log(
            'Loading model...',
            100.0 * (progress.loaded / progress.total),
            '%',
        )
    }
);
今回はひとまずここまでとし、BlendShape やポーズの変更についてはまた別な記事にまとめようと思います。